

The journey to electric vehicle ownership is exciting, but one question looms large for many new or prospective EV owners: "How do I set up charging at home?" With the right planning and setup, your garage can become more than just a parking space—it can be the primary fueling station for your electric vehicle. Home charging not only provides convenience but can significantly reduce your overall charging costs compared to public options. In this comprehensive guide, we'll walk you through everything you need to know about converting your garage into an optimal EV charging setup, from assessing your electrical capacity to choosing the right equipment and maximizing charging efficiency.
Understanding Your Home's Electrical Capacity
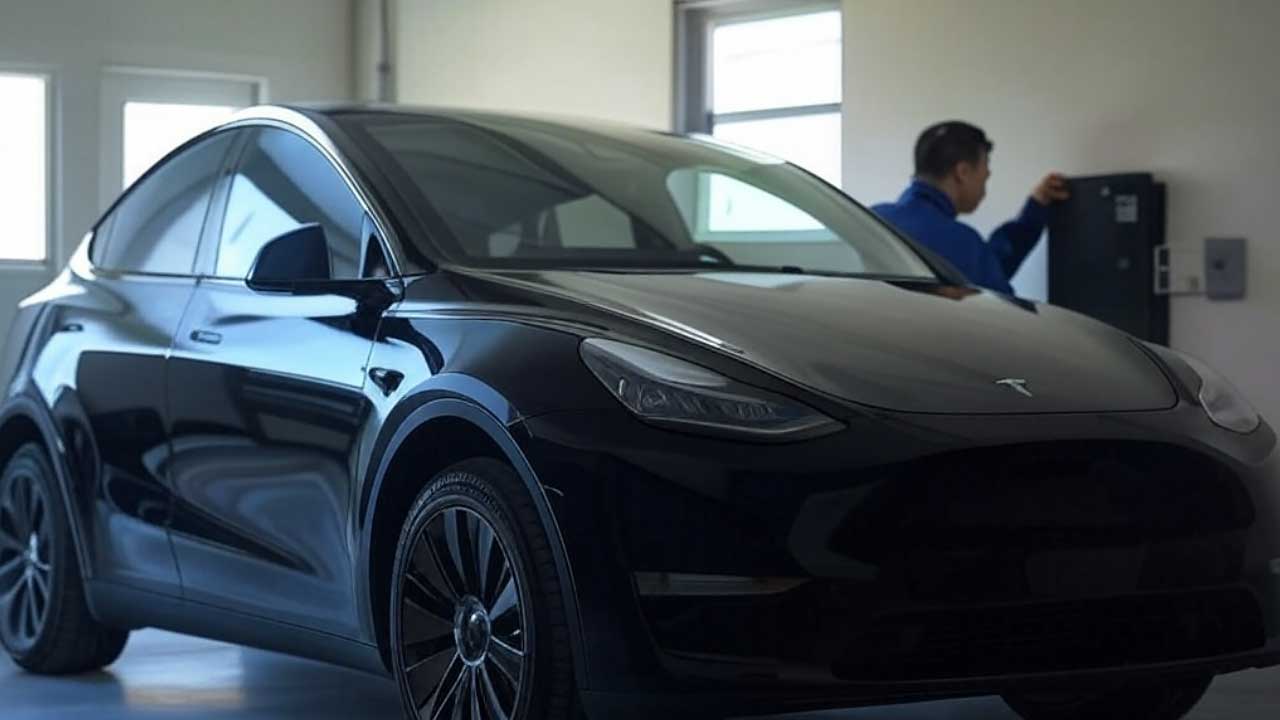
When I first brought home my Tesla Model Y in 2022, I was so excited to start my EV journey that I didn't give a second thought to my home's electrical system. Big mistake! After plugging in the included mobile charger to a regular outlet, I was shocked (pun intended) to find it would take over 30 hours for a full charge. That's when I realized I needed to get serious about understanding my home's electrical capacity.
Look, I'm no electrician, but I've learned a ton about residential electrical systems since then. Your home's electrical service is the foundation of your EV charging setup, and getting this part right will save you headaches down the road!
Assessing Your Electrical Panel
First things first - you need to take a good look at your electrical panel. In most homes, you'll find it in the garage, basement, or utility room. The main panel will have a big number on it - typically 100A, 150A, or 200A (that's amperage). This number is SUPER important because it tells you the total electrical capacity your home can handle at once.
My 1980s home came with a 100A panel, which was fine for regular appliances but started to show its limitations once I added EV charging to the mix. If you're in a newer home (built after 2000), you probably have a 200A service, which gives you much more flexibility.
Pro tip: Take photos of your panel with the cover open (safely, please!) and show them to an electrician. They can spot things like available breaker spaces and panel condition that might not be obvious to you.
The Math Behind EV Charging
Here's where things get a bit technical, but stay with me! A Level 2 EV charger (the kind you want for overnight charging) typically requires:
- A 240-volt circuit
- Between 30-50 amps of dedicated capacity
- Its own double-pole circuit breaker
When I installed my 40-amp charger, my electrician explained that we have to follow the 80% rule for continuous loads like EV charging. So a 40-amp charger actually needs a 50-amp circuit breaker, which uses up a substantial chunk of my home's total capacity.
For context, here's what some common household items use:
- Electric dryer: 30 amps
- Electric range: 40-50 amps
- Central AC: 30-40 amps
- Water heater: 30 amps
If you've got a 100A panel like I had, you can quickly see how adding a 50-amp circuit for EV charging might push things to the limit!
Do I Need an Upgrade?
This is where many homeowners get stuck. Panel upgrades aren't cheap - I was quoted $2,500-4,000 to upgrade to 200A service. But whether you need one depends on several factors:
-
Load calculation: A proper electrician should perform a load calculation, which analyzes all the electrical demands in your home. When mine did this, we discovered we were already at 85% capacity before adding the charger!
-
Charging needs: Be honest about your driving habits. I commute 40 miles daily, so I need about 12-15 kWh each night. A lower-amperage charger (like a 16A or 20A model) might be sufficient if you have similar needs.
-
Future plans: This was the clincher for me. We were planning to add another EV within two years, so the panel upgrade made sense for our situation.
One workaround I considered was a load management system like the Tesla Wall Connector with load sharing or third-party smart chargers that can adjust their power draw based on your home's usage. These can be brilliant solutions if you're tight on capacity!
Working With Electricians
Finding the right electrician makes ALL the difference. I called five before finding one who specialized in EV installations. The first couple didn't seem familiar with load calculations or the specific requirements for EV charging.
Ask potential electricians:
- How many EV chargers have you installed?
- Are you familiar with local permitting for EV chargers?
- Can you perform a proper load calculation?
- What options do I have if my panel is at capacity?
The best electricians will discuss options like:
- Panel upgrades
- Subpanels dedicated to your garage
- Load management systems
- Alternative charging solutions
My electrician suggested a 60-amp subpanel in the garage that could support my current charger and have room for expansion. This ended up being more cost-effective than a complete panel replacement!
Hidden Electrical Issues
One thing that caught me by surprise was discovering aluminum wiring in parts of my home during the assessment. This required special attention and slightly increased the project cost. Your electrician might uncover similar issues:
- Outdated wiring
- Code violations that need correction
- Grounding issues
- Panel replacements needed due to obsolete models (particularly Federal Pacific or Zinsco panels, which are fire hazards)
These discoveries can be frustrating, but addressing them is essential for safety. In my case, the aluminum wiring connections needed special treatment to prevent fire risks.
Getting your electrical capacity right is the foundation of a successful home charging setup. Yes, it might require some investment upfront, but the convenience of waking up to a fully charged vehicle every morning is absolutely worth it. Plus, compared to the cost of the EV itself, creating a proper charging infrastructure is a relatively small investment that enhances the overall ownership experience.
Next time, I'll take you through selecting the right charging equipment once you've got your electrical situation sorted out!
Types of Home EV Chargers Explained
Let me tell you about the time I bought my first EV charger without doing proper research. I ended up with a basic 16-amp unit that took forever to charge my car! Three months and several hundred dollars later, I upgraded to something that actually met my needs. Don't make the same expensive mistake I did!
Home charging options can be confusing at first, but once you break them down, the choices become much clearer. I've tested several different setups over the years, and I'm excited to share what I've learned through trial and error.
Level 1 vs. Level 2: The Fundamental Difference
When I first brought home my EV, I relied on the Level 1 charger that came with the car. Big mistake for daily use!
Level 1 Charging (120V): This is your basic household outlet charging. The charger plugs into a standard wall outlet (the same kind your phone charger uses), and delivers about 2-5 miles of range per hour of charging. I quickly discovered this wasn't practical for my daily commute.
Some hard numbers from my experience:
- Charging speed: 2-5 miles of range per hour
- Installation cost: $0 (uses existing outlets)
- Equipment cost: Often included with vehicle
- Best for: Occasional charging, PHEVs with small batteries, or emergency backup
Level 2 Charging (240V): This is what transformed my EV ownership experience! Level 2 chargers use the same voltage as your clothes dryer or electric oven. They deliver 12-37 miles of range per hour, depending on the amperage and your car's onboard charger capabilities.
From my testing:
- Charging speed: 12-37 miles of range per hour
- Installation cost: $400-1,500 depending on your electrical setup
- Equipment cost: $300-700 for quality units
- Best for: Daily charging, complete overnight refills
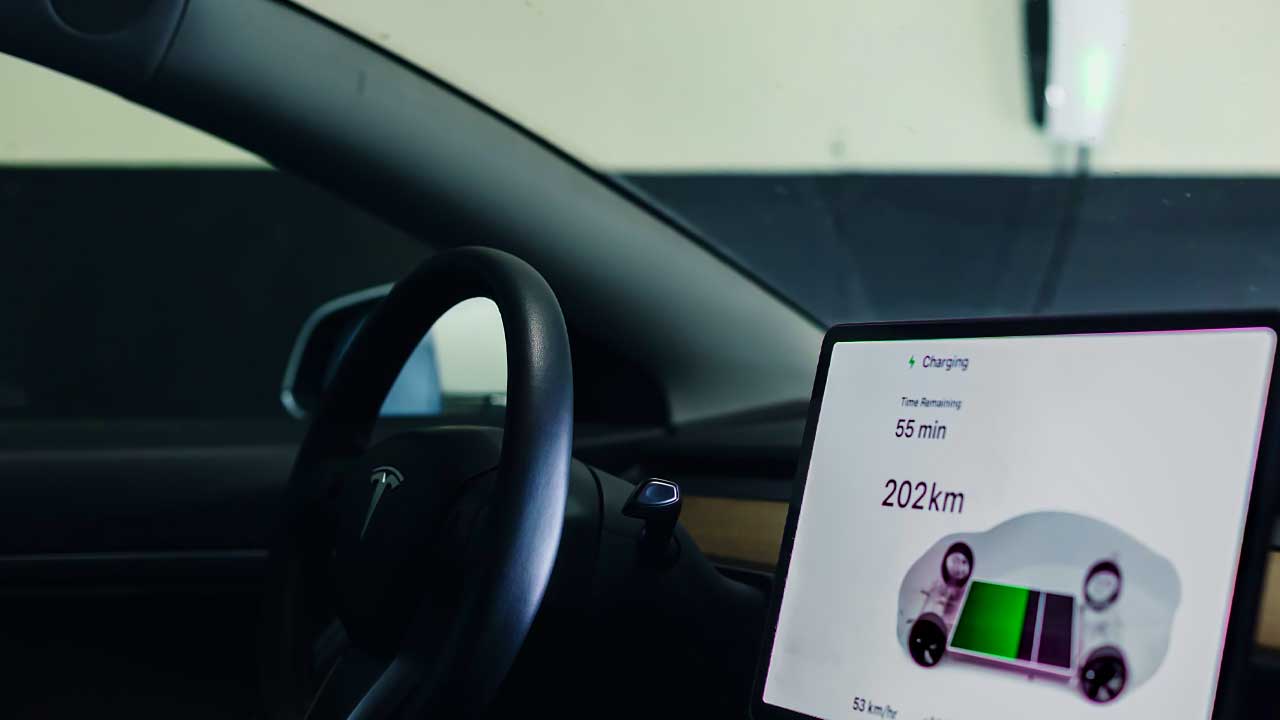
I remember the first night after installing my Level 2 charger - I plugged in at 8 PM with 30 miles of range left and woke up to a full battery (270 miles). It was like having my own personal gas station that filled up my car while I slept!
Hardwired vs. Plug-in EVSE: A Important Decision
When I renovated my garage last year, I had to decide between a hardwired or plug-in charging station. Each has distinct advantages.
Hardwired Chargers: These connect directly to your electrical system, similar to how a ceiling light is installed. My electrician recommended this option for my permanent setup.
Pros I've experienced:
- Generally allows for higher amperage (faster charging)
- Cleaner installation appearance with no visible outlet
- Sometimes preferred for outdoor installations for weatherproofing
- May be required by some local building codes
Cons I discovered:
- Can't take it with you if you move (I learned this the hard way!)
- Requires an electrician for any maintenance or replacement
- Typically more expensive installation
Plug-in Chargers: These connect to a 240V outlet (typically NEMA 14-50, like an RV hookup). I started with this option in my previous home.
Pros I appreciated:
- Portability – I took it with me when I moved
- Easier to replace or upgrade the charging unit
- Can unplug to free up the circuit for other high-power tools
- Often slightly cheaper installation
Cons to consider:
- Some local codes restrict certain plug types for EV charging
- Maximum amperage is typically limited to 40A (50A circuit)
- Requires a bulky outlet installed in your garage
I initially went with a plug-in unit and was grateful for that choice when I moved! At my new house, I switched to a hardwired 48-amp charger for the faster charging speed.
Understanding Amperage: Speed Matters!
This is where many new EV owners get confused. The amperage of your charger directly affects how quickly your car charges. However, your car's onboard charger also limits the charging speed.
From my testing of different setups:
16-20 Amp Chargers:
- Charging speed: ~12-15 miles of range per hour
- Circuit requirement: 20-25 amp dedicated circuit
- Good for: Plug-in hybrids, shorter commutes, overnight charging with plenty of time
32 Amp Chargers:
- Charging speed: ~25 miles of range per hour
- Circuit requirement: 40 amp dedicated circuit
- Good for: Most daily drivers, complete overnight charging for most EVs
40-48 Amp Chargers:
- Charging speed: ~30-37 miles of range per hour
- Circuit requirement: 50-60 amp dedicated circuit
- Good for: Long-range EVs, multiple drivers sharing one charger, vehicles with large batteries
I started with a 16-amp charger and it was painfully slow for my 75kWh battery. Upgrading to a 40-amp unit was a game-changer - my charging time was cut by more than half!
One mistake I made: not checking my car's maximum AC charging rate. My first EV could only accept 32 amps regardless of the charger, so buying a 40-amp unit provided no additional benefit. Don't make my mistake - check your car's specs first!
Smart Chargers vs. Basic Chargers: Are Extra Features Worth It?
When I bought my first charger, I went with the cheapest option. Six months later, I upgraded to a smart charger and wondered why I hadn't done that from the start.
Basic Chargers:
- Function: Simply deliver electricity to your car
- Features: Maybe a light indicating it's working
- Cost: $200-400 for quality units
- Best for: Budget-conscious buyers who don't need bells and whistles
Smart Chargers:
- Function: Charging plus data, control, and optimization
- Features: Smartphone apps, charging schedules, energy monitoring, utility integration
- Cost: $450-700 for good units
- Best for: Tech-savvy users, time-of-use utility customers, solar panel owners
The smart features I found most valuable:
- Scheduled charging: I programmed my car to only charge during off-peak hours (midnight to 6 AM) when electricity costs 60% less.
- Energy monitoring: Tracking exactly how much electricity my car uses helped me optimize my driving habits.
- Remote control: Being able to start/stop charging from my phone was surprisingly useful.
- Power adjustment: During summer heatwaves, I could dial back the amperage to reduce strain on the grid.
My ChargePoint Home Flex paid for itself within a year through off-peak charging savings alone. That said, if you don't have time-of-use electricity rates, the premium features might be less valuable to you.
Future-Proofing Your Setup
The biggest lesson I learned? EVs and charging technology evolve rapidly. What seemed adequate three years ago feels limiting today.
When planning your setup, consider:
- Your next vehicle: Will you likely buy an EV with a larger battery or faster charging capability?
- Multiple EVs: Many households end up with two EVs sooner than expected.
- Charging standards: While home charging is fairly standardized, ensure your equipment works with your vehicle type.
I installed a 60-amp circuit even though my first charger only needed 40 amps. This extra capacity meant I could upgrade to a 48-amp charger when I got my second EV without any electrical work.
For multi-vehicle households, consider these options I explored:
- Dual charging stations: More expensive but most convenient
- Single high-powered station with a long cable: Can reach multiple parking spots
- Smart chargers with power-sharing: Some can split available power between two vehicles
When my partner also switched to an EV, the foresight of installing extra capacity saved us thousands in additional electrical work!
Choosing the right charger involves balancing your current needs, future plans, and budget constraints. I've found that spending a bit more upfront for quality equipment and proper installation has paid dividends in convenience and reliability. And remember - the charger is a small investment compared to the vehicle itself, so don't cut corners on the equipment that will power your car every day!
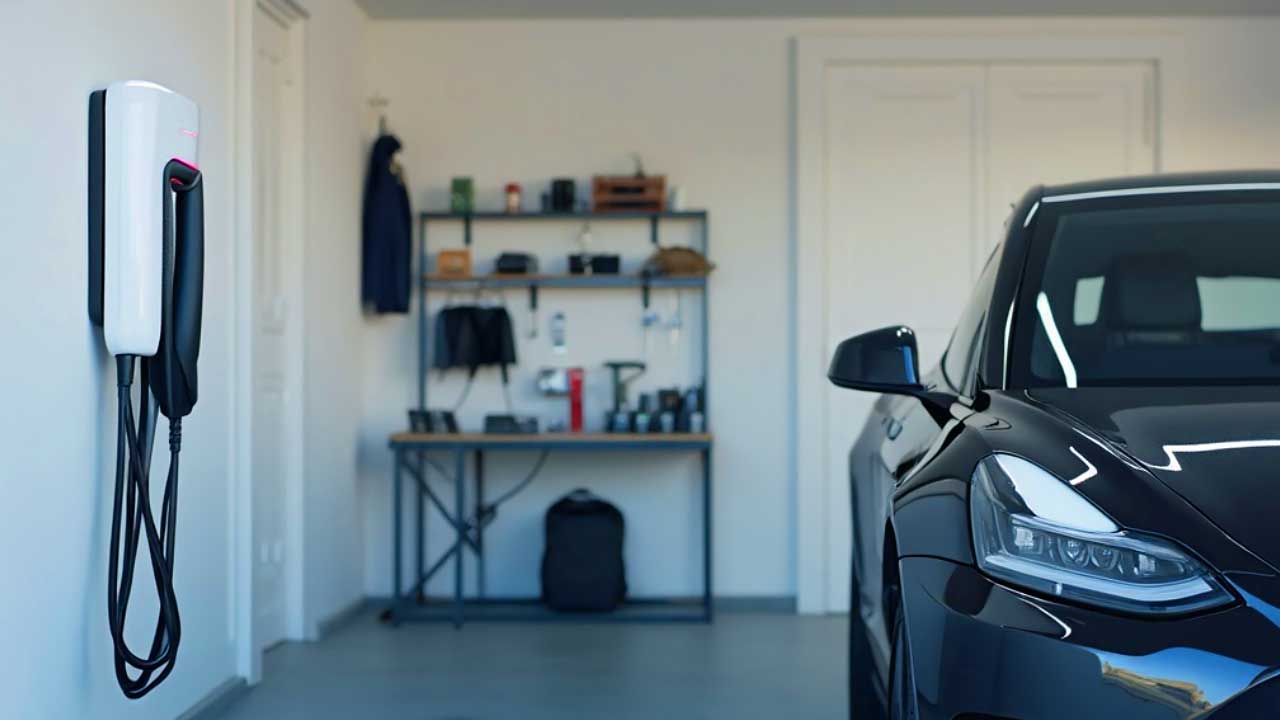
Optimal Garage Layout for EV Charging
When I first installed my Level 2 charger, I mounted it right next to the electrical panel because it seemed logical. Big mistake! The short cable barely reached my car's charging port, and I had to park at an awkward angle every single night. After a month of frustration, I relocated the charger and completely rethought my garage layout. Trust me, a little planning goes a long way here!
Strategic Charger Placement
The location of your charging port on your vehicle is the starting point for everything. I've owned three different EVs, and each had the charging port in a different spot:
- My Tesla had it on the left rear
- My Nissan had it on the front nose
- My Hyundai has it on the front left fender
Each required a different charging strategy! Here's what I've learned through trial and error:
First, park your car in its normal position and note exactly where the charging port is. Then, consider mounting your charger so that:
- It's close enough to reach the port without stretching the cable
- The cable doesn't have to cross walkways when in use
- You can easily see the charger's indicators/display
- It doesn't block access to other items you need
I originally mounted my charger at the rear of my garage, but soon realized the front corner was much more practical for my vehicle. Making this small change transformed my daily charging from a frustrating chore into a 5-second task.
Pro tip: Before drilling ANY holes, temporarily hang your charger with removable hooks and test the setup for a few days. You'll likely discover positioning issues you hadn't anticipated!
Cable Management: The Overlooked Essential
After three years of EV ownership, I can confidently say that cable management might be the most underrated aspect of home charging. Nothing's more annoying than a charging cable that's always tangled, lying on the floor collecting dirt, or getting run over by your tires.
Solutions I've tried, from worst to best:
- Hanging the cable over the charger (quickly becomes messy)
- Basic wall hooks (better, but cable often slips off)
- Retractable cable systems (convenient but expensive)
- Purpose-built EV cable organizers (my current setup)
My favorite arrangement uses a combination of:
- A wall-mounted holder that keeps the connector head protected when not in use
- A simple cable track that prevents the cable from touching the ground
- A small bungee cord near the unit to take up slack
This $40 setup has saved me countless headaches and probably extended the life of my charging cable significantly. I've seen too many charging cables with cracked insulation from being repeatedly driven over or tripped on!
Remember - the cable is one of the most expensive components of your charging system. Proper management keeps it clean, prevents damage, and makes your daily charging routine much more pleasant.
Multi-Vehicle EV Households: Special Considerations
When my partner also got an EV last year, our single-charger setup suddenly became inadequate. We tried sharing the charger by swapping cars in the middle of the night (yes, really), but that got old fast!
Here are the options we considered for our two-EV household:
Option 1: Two separate charging stations
- Pros: Each car has dedicated charging
- Cons: More expensive, requires two circuits, more wall space needed
Option 2: One high-amperage charger with a longer cable
- Pros: Lower cost, single installation
- Cons: Can only charge one vehicle at a time, requires careful parking
Option 3: Dual-port charging station with power sharing
- Pros: Can charge two vehicles simultaneously, efficient use of electrical capacity
- Cons: Higher upfront cost, slower charging when both cars are plugged in
We ultimately went with Option 3, installing a dual-port 40-amp station that splits power when both cars are charging. This works perfectly since both cars are usually parked for 10+ hours overnight, so the slower charging speed isn't an issue.
The key to making this work was creating a parking plan where both vehicles' charging ports were accessible with the cable lengths available. We actually drew chalk outlines on the garage floor showing the ideal parking positions for each car!
Weather and Temperature Considerations
My first winter with an EV taught me some hard lessons about temperature effects on charging equipment. My original charger was installed on an uninsulated exterior garage wall, and its performance became inconsistent during extreme cold snaps.
Some climate factors to consider:
- Cold temperatures: Can reduce charging efficiency and strain components
- Heat exposure: Direct sun can degrade cables and electronics over time
- Moisture: Outdoor or exposed installations need proper weatherproofing
- Dust/dirt: Can impact cooling and connections if excessive
I relocated my charger to an interior wall, which kept it in a more moderate temperature range. For those with detached garages or outdoor installations, weather-rated units are essential, often with operating ranges from -30°F to 122°F.
If you live somewhere with extreme temperatures, consider:
- Installing a simple awning over outdoor chargers for sun/precipitation protection
- Using cable covers with UV protection for exposed cables
- Selecting chargers with wider operating temperature ranges
- Ensuring outdoor installations have proper drainage away from electrical components
I learned the importance of this when a neighbor's outdoor charger failed after being partially buried in snow for several days during a blizzard!
Space-Saving Mounting Options
Not all of us have spacious three-car garages with empty walls. My first home had a tiny single-car garage that was already packed with tools, bicycles, and storage. Finding space for the charging station required creative thinking.
Space-saving solutions I've used or seen work well:
- Pedestal mounts: Free-standing charger mounts that don't require wall space
- Ceiling-mounted retractable cables: Keeps the charger overhead and cables out of the way
- Combination units: Some chargers can be mounted on the same pedestal as garage lighting
- Recessed wall installations: When permitted by the manufacturer, some units can be partially recessed into walls
My current favorite setup uses a fold-out mounting arm that allows the charger to be swung away when not in use. This was especially useful in my small garage where every inch of space mattered.
For those really tight on space, some newer chargers have remarkably small footprints - about the size of a small tablet computer rather than the bulky boxes of earlier generations.
Garage Lighting Considerations
This might seem minor, but proper lighting around your charging area makes a huge difference in daily use. I learned this the hard way after struggling to plug in during dark winter evenings.
Simple improvements that made my charging experience better:
- Installing a small LED light directly above the charging area
- Adding motion-activated lighting that turns on when I enter the garage
- Using reflective markers on the floor to guide perfect parking alignment
- Ensuring the charger's indicator lights are visible from the driver's seat
Some newer chargers even have built-in lighting that illuminates when the connector is removed from the dock, which is incredibly helpful for nighttime charging.
After three years of tweaking my setup, I've found that the perfect garage charging layout balances practicality, safety, and convenience. The time invested in optimizing your charging area pays dividends in the form of stress-free daily charging and a cleaner, more organized garage space. And remember - what works for someone else's garage might not work for yours, so don't be afraid to experiment until you find your ideal arrangement!
Step-by-Step Installation Process
The day my electrician arrived to install my first Level 2 charger was when reality hit - this wasn't as simple as plugging in a new appliance! I had spent weeks researching chargers but hadn't given much thought to the actual installation process. What followed was a crash course in permits, electrical work, and inspections that I wish someone had prepared me for.
Permitting Requirements: Don't Skip This Step!
I nearly made a huge mistake by having my first charger installed without proper permits. A neighbor (thankfully) warned me that this could cause insurance issues if anything ever went wrong. Here's what I learned about the permitting process:
Most localities require electrical permits for EV charger installations, especially for Level 2 chargers. The requirements vary wildly depending on where you live:
- Some cities have streamlined "EV-ready" permit processes that take just days
- Others lump EV chargers in with major electrical work, requiring detailed plans
- A few places even offer expedited permitting or reduced fees for EV installations
When I applied for my permit, I needed to provide:
- Specifications of the charging equipment
- A simple site plan showing where the charger would be installed
- Details of the electrical service and planned circuit
- My electrician's license information
The permit for my installation cost $75 and took about a week to approve. Some of my friends in EV-friendly cities got same-day permits for as little as $50, while others in more bureaucratic areas waited nearly a month!
Pro tip: Many utilities offer rebates for permitted EV charger installations. I received a $500 rebate from my power company, which more than covered the permitting costs and some of the installation expense. I would have missed out on this if I had skipped the permit!
Finding a Qualified Electrician
Not all electricians are created equal when it comes to EV charging installations. I learned this the expensive way after hiring a general electrician for my first installation who had to come back three times to fix issues.
When searching for an electrician, I recommend asking these specific questions:
- How many EV charger installations have you completed?
- Are you familiar with the latest NEC (National Electrical Code) requirements for EV charging?
- Do you handle the permitting process or will I need to do that?
- Can you provide references from other EV charger installations?
- Are you familiar with utility rebate programs for EV charging?
The price difference between electricians can be substantial. I received quotes ranging from $400 to $1,200 for essentially the same work. The cheapest wasn't always the worst, nor was the most expensive necessarily the best. Experience with EV installations specifically was the best predictor of a smooth process.
I found my current electrician through an EV owners' group, and his expertise made the process incredibly smooth compared to my first installation. He knew exactly which permits were needed, had relationships with the inspectors, and understood the utility rebate paperwork.
DIY vs. Professional Installation
Can you install your own EV charger? Maybe. Should you? That's a different question.
I'm fairly handy and considered installing my 240V outlet myself. After researching what was involved, I decided against it for several reasons:
- Working with high-voltage electricity carries serious safety risks
- Most jurisdictions require licensed electricians for permit approval
- Mistakes could void home insurance coverage or charger warranties
- Professional installation often includes load calculations I wasn't qualified to perform
That said, there are components of the installation you might handle yourself:
- Researching local permit requirements
- Purchasing the charging equipment and necessary supplies
- Preparing the installation area (clearing wall space, running conduit paths)
- Handling the rebate paperwork after installation
If you're determined to DIY, plug-in chargers using NEMA 14-50 outlets are generally simpler than hardwired units. Just remember that even if you're qualified to do electrical work, most localities still require permits and inspections regardless of who does the installation.
What to Expect During Installation Day
When installation day finally arrived, I wasn't prepared for what it actually entailed. Here's what typically happens during a professional installation:
-
Initial assessment (30-60 minutes):
- The electrician evaluates your electrical panel
- Determines the best route for running new wiring
- Confirms the mounting location for the charging unit
-
Preparation work (1-2 hours):
- Shutting off power to work safely (be prepared for this!)
- Installing a new circuit breaker in your panel
- Preparing the mounting area for the charger
-
Running wiring (1-3 hours, highly variable):
- This is where installations differ most dramatically
- Simple installations might run conduit along exposed basement joists
- Complex installations might require drilling through walls or ceilings
- The length of the wiring run significantly impacts time and cost
-
Mounting and connecting the charger (30-60 minutes):
- Physically mounting the charging unit to the wall
- Connecting the wiring to the unit
- Testing the connections before restoring power
-
Testing and demonstration (15-30 minutes):
- Powering up the system to verify proper functioning
- Checking for proper grounding and voltage
- Demonstrating how to use the charger with your vehicle
My first installation was supposed to take 3 hours but stretched to 7 due to unexpected complications (discovering aluminum wiring that required special connections). My second installation, with better preparation and a more experienced electrician, took just 2.5 hours.
Things that can extend the installation time:
- Long distances between your electrical panel and garage
- Difficult access for running wires (finished walls, concrete barriers)
- Panel upgrades or service changes if needed
- Outdated wiring that needs to be brought up to code
I recommend clearing your schedule for the day and ensuring your car is charged enough to not need immediate use of the new charger, just in case there are delays.
Common Installation Challenges
Every installation has its quirks. Here are some common challenges I've experienced or heard about from other EV owners:
1. Panel capacity limitations When my electrician performed a load calculation, we discovered my panel was already near capacity. Solutions included:
- Installing a subpanel specifically for the garage
- Upgrading the main service panel (expensive but sometimes necessary)
- Using a lower-amperage charger that fits within existing capacity
- Installing load management devices that prevent circuit overloads
2. Distance challenges My detached garage was 60 feet from my house, creating a unique challenge. Options included:
- Trenching for underground conduit (expensive but cleanest solution)
- Running overhead wiring (less expensive but potentially unsightly)
- Installing a separate electrical service for the garage (cost-effective for very long runs)
3. Older home complications My 1980s home had some outdated electrical components that needed addressing:
- Replacing outdated panel components
- Upgrading grounding systems to meet current code
- Addressing knob-and-tube or aluminum wiring if present
4. Condo and HOA restrictions A friend in a condo faced strict installation requirements:
- Getting board approval (which took months)
- Using only approved contractors
- Following specific aesthetic guidelines for visible equipment
- Submitting detailed plans before and after photos
If you live in a managed community, start the approval process early!
Post-Installation Inspection and Testing
After installation comes inspection - a step many homeowners don't anticipate. In most jurisdictions, your new electrical work must be inspected before it's considered legally complete.
The inspection process typically involves:
- Scheduling an appointment with the local building department
- Having either you or your electrician present during inspection
- The inspector checking that all work meets current electrical code
- Receiving final approval documentation for your records
My first inspection failed because the charger was mounted too low according to local code (which required it to be at least 18 inches above the garage floor for flood protection). This required another visit from the electrician and a second inspection appointment - delays I hadn't planned for.
After passing inspection, I recommend performing your own additional testing:
- Monitoring the charger and circuit breaker during the first few charging sessions
- Checking for any unusual heating of the outlet, plug, or charger
- Verifying charging speeds match what you expected
- Testing any smart features or apps that came with your charger
This careful post-installation monitoring helped me identify a loose connection that was causing intermittent charging interruptions before it became a bigger problem.
Documentation Worth Keeping
One final tip that's saved me headaches: create a folder (physical or digital) with all your charging station documentation:
- Installation permit and inspection certificates
- Charger warranty information and manual
- Electrician's invoice with detailed work description
- Photos of the installation (especially showing the inside of any junction boxes before they were closed up)
- Any utility rebate confirmation
This documentation proved invaluable when I sold my previous home - the EV charger installation actually became a selling point, and having all the proper paperwork gave the buyers confidence in the safety of the system.
Installing an EV charger isn't as simple as plugging in a new appliance, but with proper planning and the right professionals, it's a manageable project that transforms your EV ownership experience. The installation day might bring some surprises, but the convenience of home charging makes any temporary hassles well worth the effort!
Setting up an optimal EV charging station in your garage is a worthwhile investment that enhances the convenience and economics of electric vehicle ownership. By carefully assessing your electrical capacity, selecting the right equipment, and optimizing your garage layout, you can create a seamless charging experience that becomes part of your daily routine. Remember that while some aspects of the setup process may seem complex, the long-term benefits—including lower fueling costs, increased convenience, and contributing to a cleaner environment—make it well worth the effort. As EV technology continues to evolve, your home charging setup will become an increasingly valuable asset. We encourage you to share your own garage conversion experiences in the MOTORWATT community!
Related Video
