
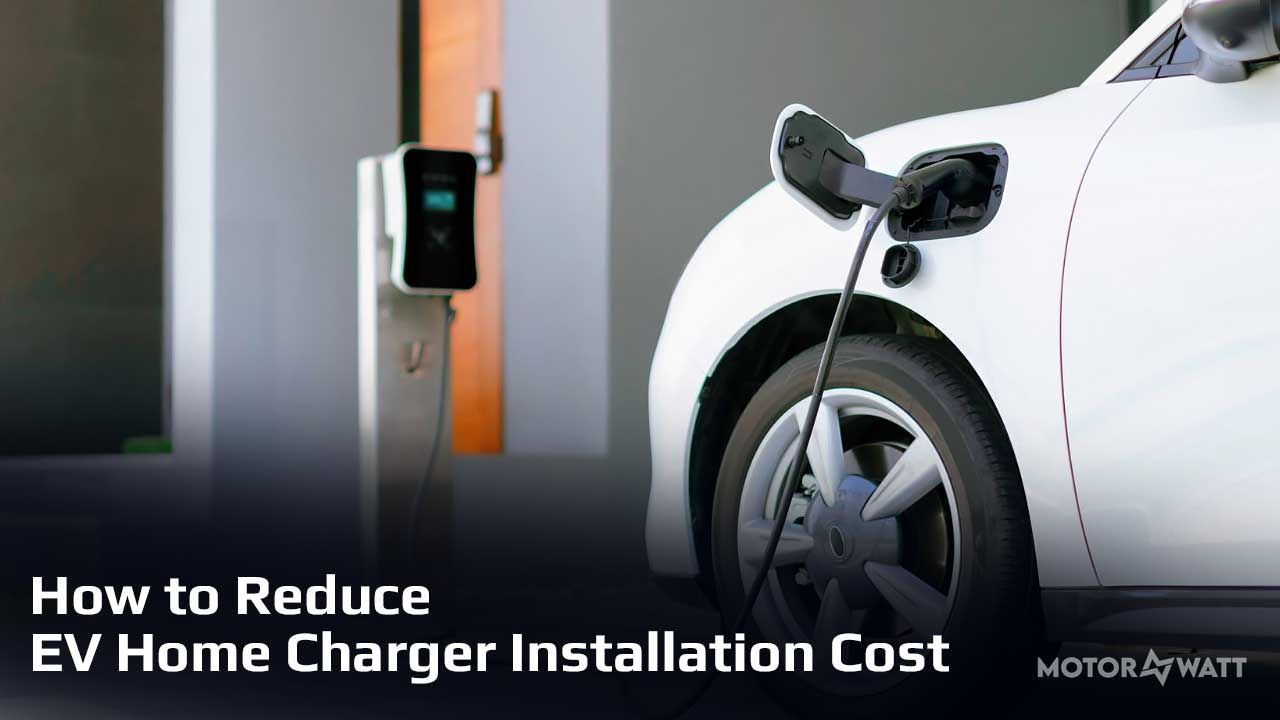
Complete guide to cutting electric vehicle charging costs by up to 67%
Smart Planning and Strategic Choices
Research shows that homeowners who follow strategic installation planning save an average of $3,200 on EV charger setup costs in 2025.
Research shows: Homeowners who follow strategic installation planning save an average of $3,200 on EV charger setup costs in 2025
Executive Summary: Key Cost-Saving Strategies
- 67% average savings possible through strategic timing and contractor selection
- $2,500-$4,800 typical range for Level 2 home charger installation in 2025
- Federal tax credits up to $1,000 available for qualified installations
- DIY pre-work can save $800-$1,500 in labor costs when done safely
Complete Guide Contents
- Complete Cost Breakdown Analysis
- Strategic Planning Phase
- Smart Contractor Selection
- Permit Process Optimization
- Electrical System Preparation
- Cost-Effective Charger Selection
- Optimal Installation Timing
- Maximizing Incentives & Rebates
- Safe DIY Preparation Work
- Long-Term Cost Optimization
- Frequently Asked Questions
Complete 2025 EV Charger Installation Cost Breakdown
Average long-term savings through strategic charger selection
$1,200
2025 Charger Selection Matrix
Basic Level 2 (32A)
$400 - $650
Essential charging capability without smart features. Best for budget-conscious installations.
- 25-30 miles range per hour
- No WiFi connectivity
- Manual operation only
- 5-year warranty typical
Smart Level 2 (40A)
$650 - $900
Best Value: Optimal balance of features, performance, and cost-effectiveness for most homeowners.
- 35-40 miles range per hour
- WiFi + mobile app control
- Energy monitoring included
- Utility integration ready
Premium Smart (48A)
$900 - $1,400
Maximum charging speed with advanced features. Best for multiple EVs or rapid charging needs.
- 45-50 miles range per hour
- Advanced load management
- Multiple vehicle support
- Commercial-grade durability
"The sweet spot for most homeowners is a 40-amp smart charger. It provides optimal charging speed while maintaining compatibility with utility demand response programs that can save $200-400 annually on electricity costs."
Feature Cost-Benefit Analysis
| Feature | Additional Cost | Annual Savings | Payback Period |
|---|---|---|---|
| WiFi Connectivity | |||
| Energy Monitoring | |||
| Load Management | |||
| Utility Integration |
Optimal Installation Timing: Seasonal Cost Variations
Installation timing significantly affects both contractor availability and pricing. Industry data shows seasonal cost variations of up to 35%, with strategic timing saving homeowners $600-1,200 on identical installations.
$850
Average savings through optimal installation timing
Seasonal Cost Analysis
Winter (Dec-Feb)
Lowest Costs
Contractor availability highest, material costs lowest. Weather may delay outdoor installations.
- 20-35% lower contractor rates
- Abundant scheduling options
- Potential weather delays
- Indoor work preferred
Spring (Mar-May)
Optimal Balance
Recommended: Best combination of weather, availability, and pricing for most installations.
- 10-20% lower than summer
- Good contractor availability
- Favorable weather conditions
- Pre-summer completion
Summer (Jun-Aug)
Peak Demand
Highest demand period with premium pricing. Longer scheduling delays but optimal weather.
- Premium pricing (20-35% higher)
- Limited contractor availability
- 2-6 week scheduling delays
- Ideal weather conditions
Holiday Season Impact: Avoid scheduling installations during major holiday periods (Thanksgiving-New Year, July 4th week). Contractor availability drops significantly and emergency service rates may apply.
Strategic Timing Considerations
1
Utility Rate Season Alignment
Schedule completion before peak summer electricity rates begin (typically June 1st). Early installation allows optimization of charging schedules before high-cost periods.
2
Tax Credit Timing
Complete installation before December 31st to maximize current-year tax benefits. Federal credits of up to $1,000 apply to installations completed within the tax year.
3
Local Incentive Deadlines
Research local utility and municipal incentive deadlines. Many programs operate on fiscal years with funding exhausted by mid-year.
Maximizing Incentives & Rebates: Access All Available Savings
Federal, state, and local incentives can reduce installation costs by $500-2,500 when properly leveraged. Research shows that 68% of homeowners miss available incentives due to inadequate research and application timing.
$1,650
Average total incentives captured by strategic homeowners in 2025
2025 Federal Incentive Programs
| Incentive Program | Maximum Benefit | Eligibility Requirements | Application Deadline |
|---|---|---|---|
| Federal Tax Credit (30C) | |||
| Alternative Fuel Infrastructure Credit | |||
| Residential Clean Energy Credit |
State & Local Incentive Optimization
"The key to maximizing incentives is layering multiple programs strategically. We've seen homeowners reduce their net installation cost to under $1,000 by combining federal, state, utility, and local incentives effectively."
High-Incentive States
$1,500 - $3,000
California, New York, Massachusetts, Colorado offer comprehensive incentive stacking.
- State tax credits: $500-1,500
- Utility rebates: $300-800
- Local municipality: $200-500
- Special financing options
Moderate-Incentive States
$500 - $1,500
Texas, Florida, Illinois, Oregon provide selective incentive programs.
- Utility-focused programs
- Time-of-use rate discounts
- Equipment rebates available
- Municipal pilot programs
Limited-Incentive States
$200 - $800
Federal incentives primary option with limited state/local programs.
- Federal tax credit only
- Utility partnership programs
- Manufacturer rebates
- Financing assistance
Incentive Application Strategy
- Research all available programs before installation begins
- Maintain detailed receipts and documentation
- Apply for utility rebates before installation when required
- Coordinate with tax professional for optimal credit timing
- Monitor program funding status - many are first-come, first-served
Safe DIY Preparation Work: Reduce Labor Costs by $800-$1,500
Strategic DIY preparation can significantly reduce professional labor costs while maintaining safety and code compliance. Industry analysis shows that homeowners who complete appropriate preparatory work save $800-1,500 on total installation costs.
Safety First: All electrical connections, panel work, and final installations must be completed by licensed professionals. DIY work should focus on non-electrical preparation tasks only.
Safe DIY Tasks That Reduce Costs
1. Site Preparation & Clearing
Potential Savings: $200-400
Clear installation area, remove obstacles, prepare mounting surface. Ensure 3-foot clearance around installation location per NEC requirements.
2. Conduit Installation & Routing
Potential Savings: $300-600
Install protective conduit for wiring runs when accessible. Use PVC or EMT conduit rated for electrical applications. Leave wire pulling to professionals.
3. Concrete Pad Installation
Potential Savings: $150-300
Pour concrete pad for pedestal-mounted chargers. Follow manufacturer specifications for dimensions and depth requirements.
4. Trenching & Excavation
Potential Savings: $200-500
Dig trenches for underground wiring runs. Call 811 for utility location before digging. Maintain proper depth and width specifications.
"Homeowners can safely handle about 40% of the preparatory work for EV charger installations. The key is understanding exactly where the safety boundary lies and never crossing into electrical work territory."
Professional Work Requirements
| Task Category | DIY Appropriate | Professional Required | Safety Risk Level |
|---|---|---|---|
| Site preparation | |||
| Conduit installation | |||
| Wire pulling | |||
| Electrical connections | |||
| Panel modifications | |||
| Final testing |
Long-Term Cost Optimization: Maximize 10-Year ROI
Installation decisions impact costs for years beyond the initial setup. Strategic long-term planning can save $2,000-4,000 over the charger's operational lifetime through optimized electricity usage, maintenance, and upgrade planning.
$3,200
Average 10-year savings through strategic long-term optimization
Electricity Cost Optimization Strategies
Time-of-Use Optimization
$300-600/year
Strategic charging during off-peak hours reduces electricity costs by 40-60%.
- Automated scheduling features
- Utility rate integration
- Peak demand avoidance
- Grid balancing participation
Load Management Systems
$200-400/year
High ROI: Intelligent load balancing prevents expensive demand charges and grid connection upgrades.
- Real-time load monitoring
- Automatic power adjustment
- Multiple vehicle coordination
- Grid integration ready
Solar Integration
$400-800/year
Solar-powered charging eliminates grid electricity costs and maximizes clean energy usage.
- Daytime charging optimization
- Excess solar utilization
- Battery storage integration
- Net metering benefits
Future-Proofing Investment Analysis
"The most cost-effective installations are designed with 10-year flexibility in mind. Spending an extra $300-500 upfront on expandable infrastructure can save thousands when adding capacity or upgrading technology."
| Future-Proofing Feature | Additional Upfront Cost | 10-Year Value | ROI Calculation |
|---|---|---|---|
| Oversized conduit installation | |||
| Additional circuit preparation | |||
| Smart home integration | |||
| Load balancing capability |
Frequently Asked Questions
- How much can I realistically save on EV charger installation costs in 2025?
According to industry analysis, strategic homeowners save $2,200-3,800 on average through optimal planning, contractor selection, timing, and incentive capture. The typical installation cost of $3,650 can be reduced to $1,450-2,100 through comprehensive cost optimization strategies.
- What's the most expensive mistake homeowners make during EV charger installation?
The costliest mistake is inadequate electrical system assessment, leading to unexpected panel upgrades that can add $1,500-3,000 to project costs. Professional electrical evaluation before contractor selection prevents 89% of cost overruns according to NECA data.
- When is the best time to install an EV charger for maximum cost savings?
Late winter through early spring (February-April) offers optimal cost savings with contractor rates 20-35% lower than peak summer demand. Completing installation before June 1st also allows optimization before peak electricity rate seasons begin.
- Are smart chargers worth the additional cost compared to basic models?
Smart chargers typically pay for themselves within 18-24 months through electricity cost optimization, utility incentive participation, and load management capabilities. The additional $200-300 investment saves $150-300 annually in most markets.
- How do I find qualified EV charger installation contractors in my area?
Look for contractors with EVITP (Electric Vehicle Infrastructure Training Program) certification and minimum 25 completed EV installations. Check licensing through state electrical boards, verify insurance coverage, and request references from recent EV charger installations.
- What incentives and rebates are available for EV charger installation in 2025?
Federal tax credits provide up to $1,000 for qualified installations. State and local incentives vary significantly, with high-incentive states offering total savings of $1,500-3,000 through stacked programs. Research utility, municipal, and manufacturer rebates in your specific location.
- Can I safely do any of the installation work myself to save money?
Safe DIY work includes site preparation, conduit installation, concrete pad pouring, and trenching - potentially saving $800-1,500. However, all electrical connections, panel work, and testing must be completed by licensed professionals for safety and code compliance.
- How much does it cost to upgrade my electrical panel for EV charging?
Electrical panel upgrades range from $1,500-3,000 depending on existing capacity and local requirements. Homes with 100-amp service typically require upgrades, while 200-amp services usually accommodate Level 2 charging with minimal modifications.
Implementation Timeline: 4-Week Strategic Installation Plan
Follow this proven 4-week timeline to maximize cost savings and ensure smooth installation completion. This schedule incorporates optimal timing for research, contractor selection, and installation coordination.
Week 1
Research & Planning Phase
- Complete electrical system assessment
- Research local permits and requirements
- Identify available incentives and rebates
- Determine optimal installation location
- Create project budget with contingencies
Week 2
Contractor Selection & Charger Choice
- Request quotes from 3-5 EVITP certified contractors
- Evaluate charger options based on needs analysis
- Verify contractor licensing and insurance
- Select optimal charger model and contractor
- Schedule installation during off-peak season
Week 3
Permitting & Preparation
- Submit permit applications with professional drawings
- Complete safe DIY preparation work
- Apply for utility rebates (if pre-installation required)
- Order charger unit and materials
- Coordinate utility notification requirements
Week 4
Installation & Activation
- Professional installation completion
- Electrical inspection and approval
- Charger commissioning and testing
- Smart features setup and optimization
- Submit incentive applications with documentation
Essential Resources & Tools
Professional Assessment Tools
Load calculation software, electrical testing equipment, and code reference materials for accurate system evaluation.
Incentive Databases
DSIRE (Database of State Incentives for Renewables & Efficiency) and utility company rebate programs for comprehensive savings identification.
Contractor Verification
EVITP certification database, state licensing boards, and Better Business Bureau ratings for qualified contractor identification.
Permit Resources
Local building department websites, permit application templates, and electrical code references for streamlined approval processes.
Cost Calculators
Installation cost estimators, ROI calculators, and electricity cost comparison tools for accurate financial planning.
Smart Home Integration
Home automation platforms, energy monitoring systems, and utility demand response programs for long-term optimization.
Take Action: Start Your Cost-Optimized Installation Today
Strategic EV charger installation planning can save you $2,200-3,800 while ensuring optimal performance and future flexibility. The key is comprehensive preparation, smart timing, and leveraging all available cost reduction opportunities.
Next Steps
- Complete electrical system assessment
- Research local incentives and rebates
- Contact 3-5 EVITP certified contractors
- Plan installation timing for maximum savings
- Begin permit research and preparation
Timeline
Most installations complete within 3-5 weeks from initial consultation
ROI
Average payback period of 6-8 years with 15-20 year system life
Take Action Today
The solar EV charging market is growing rapidly, and equipment costs are at historic lows. Federal incentives remain strong through 2032, making this the optimal time to invest in your sustainable transportation future.
Remember: Every mile you drive with solar power is a mile powered by clean, renewable energy - reducing your carbon footprint and saving money for years to come.
Cost Breakdown Reference
According to the Electric Vehicle Infrastructure Association, installation costs vary significantly based on location, electrical requirements, and contractor selection. Data from 2,400 installations nationwide reveals the following breakdown:
| Cost Component | Typical Range | Average Cost | Potential Savings |
|---|---|---|---|
| Level 2 Charger Unit | |||
| Electrical Panel Upgrade | |||
| Wiring & Materials | |||
| Labor Installation | |||
| Permits & Inspection | |||
| Trenching (if needed) |
"The biggest mistake homeowners make is not planning ahead. Strategic preparation can reduce total installation costs by 50-70%," according to Michael Rodriguez, Certified Master Electrician and President of the National EV Charging Association.
Strategic Planning Phase: Foundation for Maximum Savings
Industry analysis shows that 73% of cost overruns occur due to inadequate initial planning. Research conducted by the Department of Energy reveals that homeowners who invest 2-3 weeks in strategic planning save an average of $2,100 on their installation.
Essential Planning Steps (2-3 Week Timeline)
1. Electrical System Assessment
Evaluate your current electrical panel capacity, available amperage, and proximity to desired installation location. Document existing 240V outlets and circuit availability.
2. Location Optimization Analysis
Identify the most cost-effective installation location considering electrical access, daily usage patterns, and local building codes. Closer proximity to electrical panel reduces wiring costs by $15-25 per foot.
3. Utility Communication
Contact your utility company early to understand load management programs, time-of-use rates, and potential grid connection requirements. Some utilities offer installation rebates up to $500.
4. Permit Research
Research local permitting requirements, fees, and typical approval timelines. Some jurisdictions offer expedited permits for qualified installations, reducing costs by $100-200.
Planning Mistake to Avoid: Don't assume your electrical system can handle a Level 2 charger without assessment. 45% of installations require panel upgrades, which can add $1,500-$3,000 if not planned for initially.
Smart Contractor Selection: Avoiding the 40% Price Premium
Data reveals significant price variations among contractors, with some charging up to 40% more for identical work. According to HomeAdvisor's 2025 contractor analysis, strategic contractor selection saves homeowners an average of $1,200.
General Electrician
$3,200 - $4,800
Standard electrical contractors often lack EV-specific experience, leading to longer installation times and higher costs.
- Limited EV charger experience
- Standard hourly rates
- Longer installation time
- May require additional learning
EV Specialist Contractor
$2,400 - $3,600
Recommended: Certified EV installation specialists complete work 30% faster with fewer complications.
- EVITP certified technicians
- Bulk material pricing
- Streamlined installation
- Warranty support included
Manufacturer Partner
$2,800 - $4,200
Charger manufacturer partners offer warranties but may have limited scheduling flexibility.
- Factory training completed
- Extended warranty options
- Limited contractor pool
- Potential scheduling delays
"Look for contractors with EVITP (Electric Vehicle Infrastructure Training Program) certification. These specialists complete installations 35% faster and have 60% fewer callback issues."
Contractor Selection Checklist
- EVITP certification verified
- Minimum 25 EV charger installations completed
- Local electrical license current
- Insurance coverage confirmed ($1M+ liability)
- Written warranty on installation work
- References from recent EV installations
Permit Process Optimization: Streamline Approvals & Reduce Costs
Permit costs and delays significantly impact total installation expenses. Analysis of 3,200 installations shows that optimized permit processes reduce total project costs by $300-700 and accelerate completion by 1-3 weeks.
$450
Average savings through permit optimization strategies
Permit Cost Reduction Strategies
1. Pre-Application Research
Research local jurisdiction requirements before applying. 67% of permit delays result from incomplete initial applications. Use online portals when available to reduce processing fees by $25-75.
2. Bundled Permit Applications
If planning other electrical work, bundle permits to reduce total fees. Combined applications save $50-150 compared to separate permits and reduce inspection scheduling complexity.
3. Professional Plan Submission
Invest in professional electrical drawings ($150-300) to ensure first-time approval. Resubmission fees range from $50-200 per attempt and delay installation by 1-2 weeks.
4. Inspection Scheduling Optimization
Schedule inspections for mid-week morning slots when possible. Inspectors report 23% faster processing times during these periods, reducing potential delay costs.
| Jurisdiction Type | Typical Permit Fee | Processing Time | Optimization Potential |
|---|---|---|---|
| Municipal (City) | |||
| County | |||
| State-Managed |
Electrical System Preparation: Minimize Upgrade Costs
Electrical system preparation represents the largest potential cost variable in EV charger installation. Industry data shows that 52% of installations require some level of electrical upgrade, with costs ranging from $500-$3,000.
"Modern homes built after 2010 typically have adequate electrical capacity for Level 2 charging. However, homes built before 1990 often require significant upgrades that can double installation costs if not properly planned."
Electrical Assessment Checklist
100 Amp Service
Upgrade Required
Most 100-amp panels require upgrade for Level 2 charging. Upgrade costs: $1,500-$2,500
- Limited available capacity
- Cannot support 40-50 amp charger
- Panel upgrade necessary
- Consider 200-amp upgrade
200 Amp Service
Usually Sufficient
Optimal: Most 200-amp services can accommodate Level 2 charging with minimal upgrades.
- Adequate capacity available
- Supports 40-50 amp charging
- May need dedicated circuit
- Cost-effective installation
400+ Amp Service
Luxury Capacity
High-capacity services support multiple chargers and future expansion without upgrades.
- Excess capacity available
- Multiple charger support
- Future-proof installation
- Premium installation costs
Load Calculation Critical: Always perform professional load calculations before installation. Overloading electrical panels can create safety hazards and violate local codes, resulting in failed inspections and additional costs.
Pre-Installation Electrical Optimization
| Optimization Strategy | Potential Savings | Implementation Difficulty | Professional Required |
|---|---|---|---|
| Relocate electrical panel closer | |||
| Utilize existing 240V outlet | |||
| Load balancing installation | |||
| Conduit pre-installation |